
I may earn a commission if you click on links in this post and make a purchase.
Can a person every have too many plants? We don’t think so! Here is another way to display them with a DIY hanging plant holder.
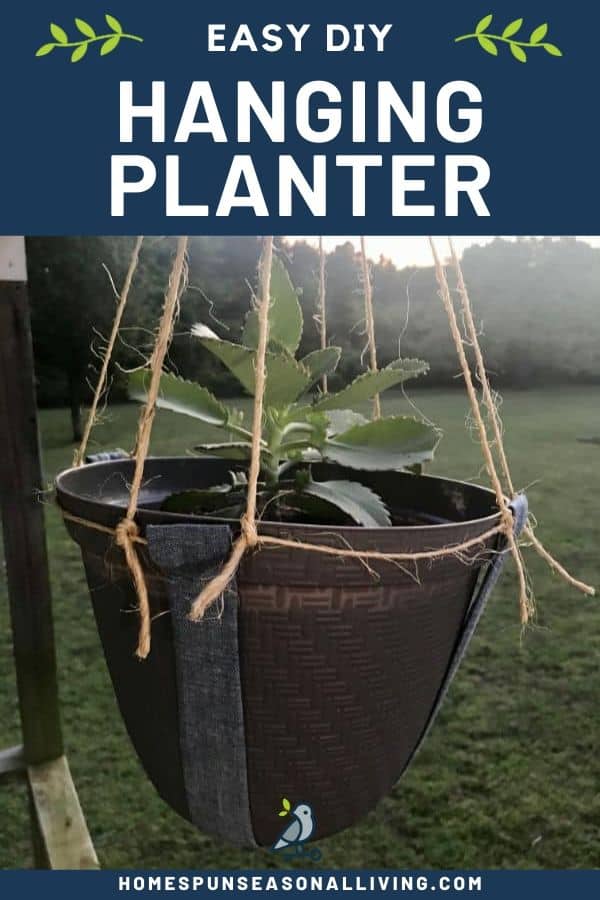
This one is made with fabric and twine. The fabric is cut from a skirt that has been outgrown, and the twine could easily be substituted with rope. It’s a great way to use what you have on hand for a new purpose.
This tutorial uses a sewing machine, but the planter could easily be sewn by hand.
Keep reading for full instructions and photos on how to make a hanging planter yourself.
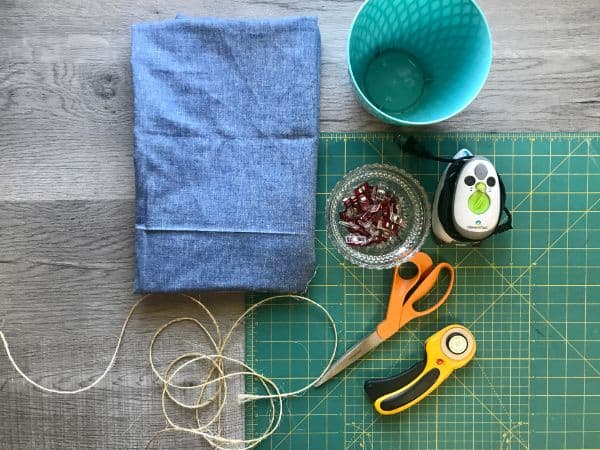
Supplies Needed
- Fabric of choice
- Twine or rope
- Planter
- Measuring tape
- Scissors
- Sewing clips
- Safety pin
- Iron and ironing board
- Rotary cutter and cutting mat (optional)
Any fabric without stretch will work for this project. It is a wonderful opportunity to reuse outgrown clothing or worn out linens. It requires very little fabric, especially if you want to hang a small pot.
How to Make a Hanging Plant Holder
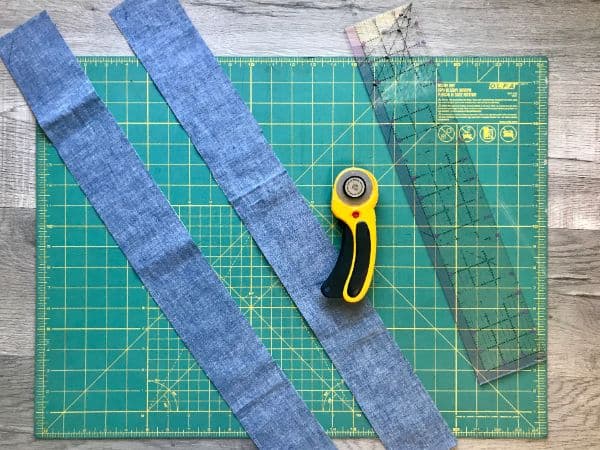
Begin by cutting two strips of fabric 3″ wide. The length will be dependent on the size of your planter.
Use a flexible measuring tape to measure from the top of your planter, down under the center of the bottom, and back up to the top of the other side. If you do not have a flexible measuring tape, you a piece of twine or rope.
Add 4″ to get your length. In the example shown, our fabric strips are cut to 3″ x 24″.
Then fold the strips in half lengthwise with right sides together if your fabric has a right side. Clip with sewing clips along the edge to hold them in place.
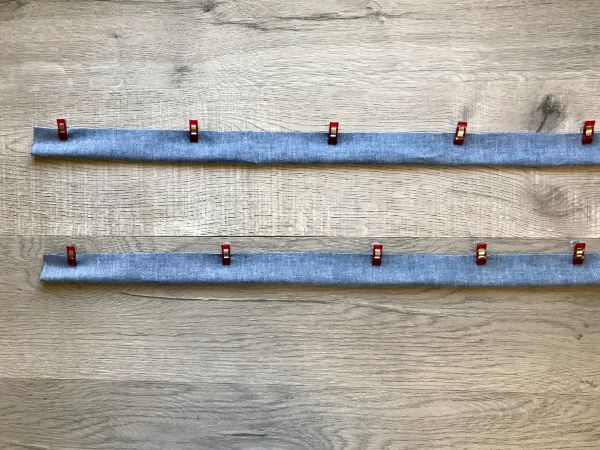
Now sew along the long, open edge on your sewing machine with a 1/4″ seam allowance.
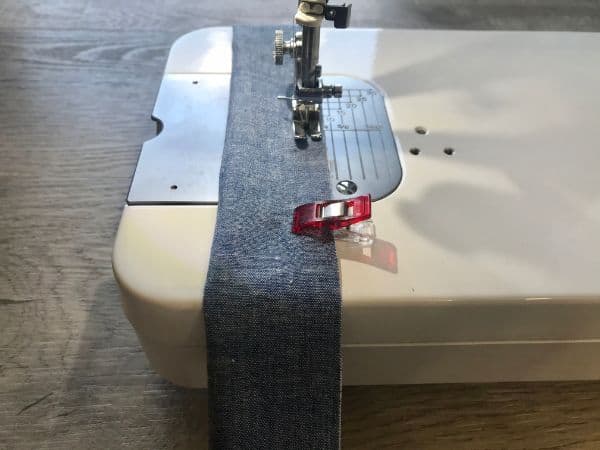
Repeat for both fabric strips. Then turn each strip right side out.
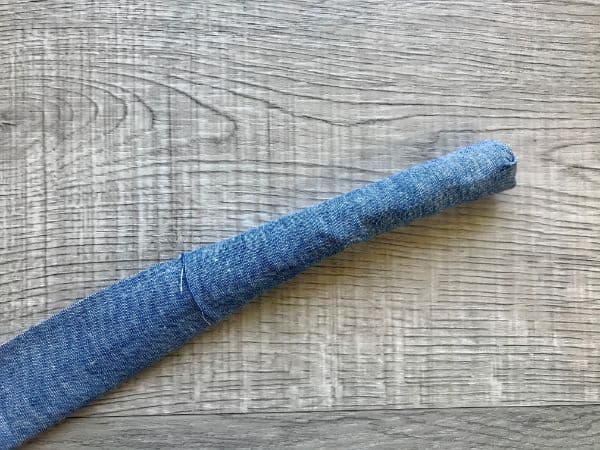
Next, press each strip with the seam running down the center.
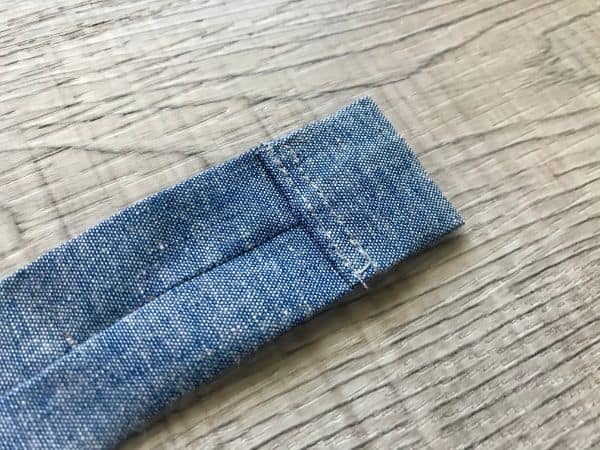
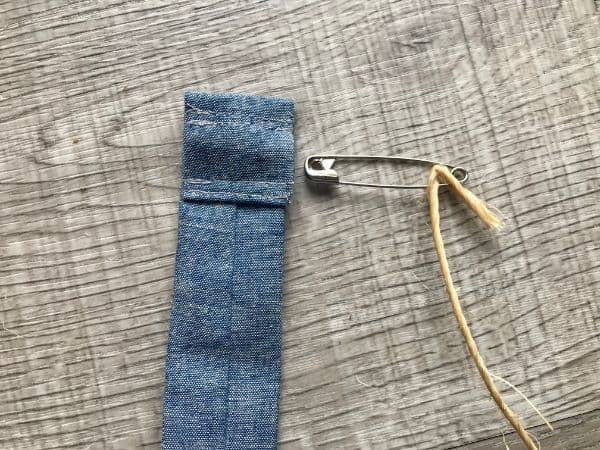
Fold each end over 1/4″ once, then twice. Then fold it over 1″ to form a casing. Press and hold with clips.
Stitch a double seam along the bottom edge of the folded fabric.
All four ends of the fabric strips should now look like the photo below.
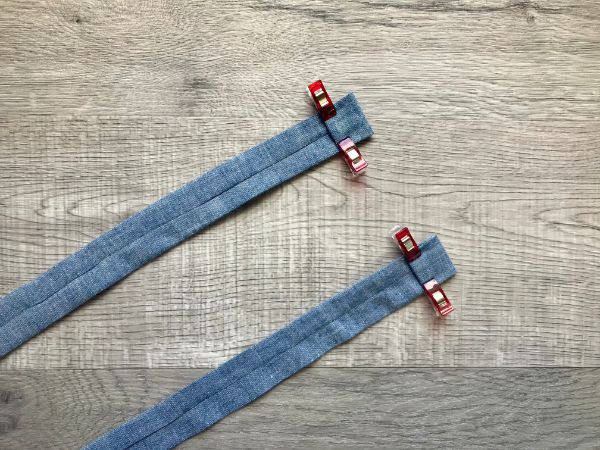
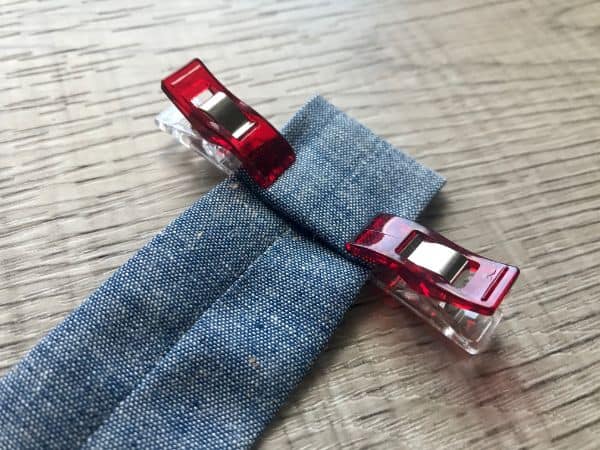
Find the center of each strip of fabric, and lay them on top of each other in a perpendicular manner. They should meet in the center forming a cross.
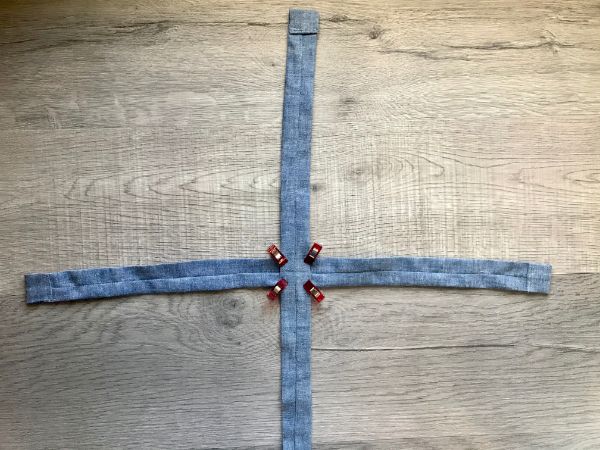
Clip where the fabric pieces meet in the center to hold.
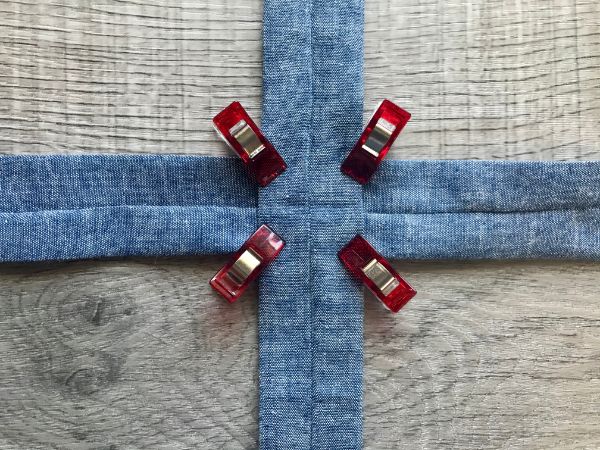
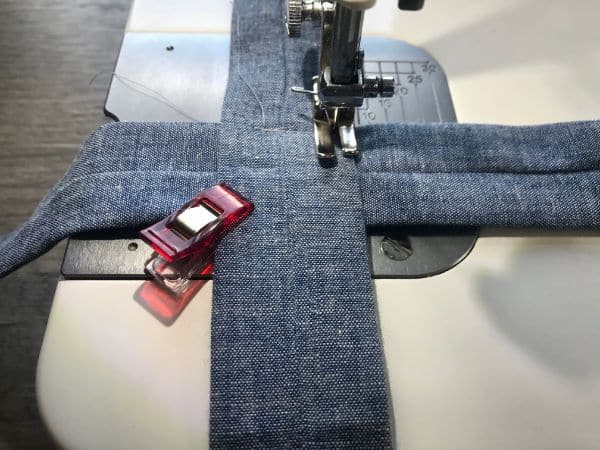
Then take the center to your sewing machine, and stitch a square to secure the two fabric pieces together.
Now it is time to add the twine. Fold the end of the twine over about 1/2″ and insert a safety pin through the fold.
Insert the safety pin through the casing in each end of the fabric.
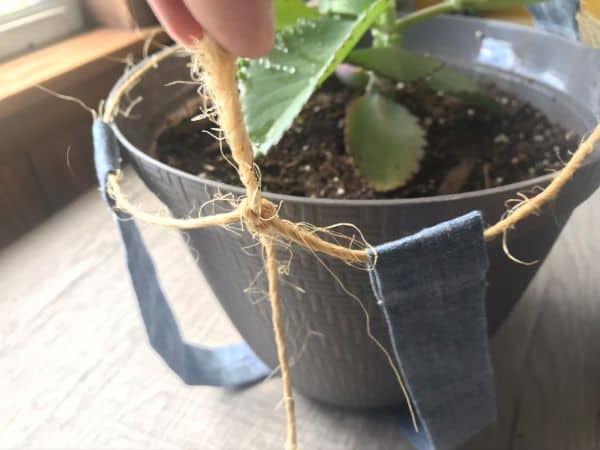
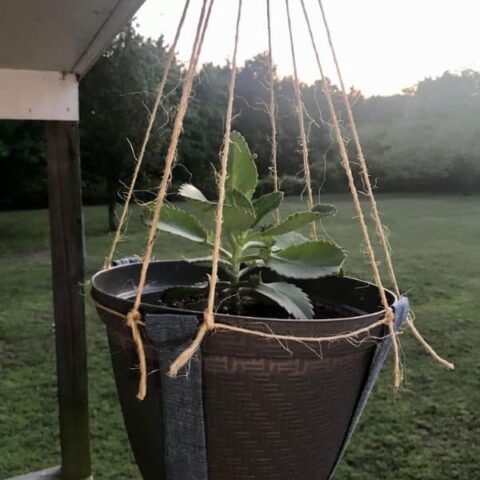
Next, place your planter in the center where the fabric strips are sewn together. Use the twine to pull the fabric up around the edge of the pot, and tie it to secure.
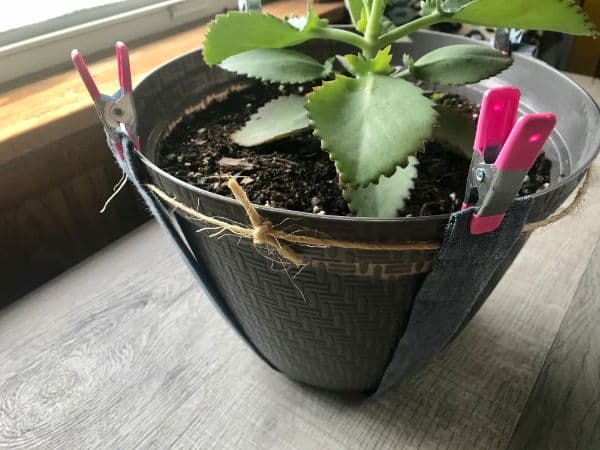
For the next step, we found it helpful to use an extra set of hands or clamps to hold the fabric pieces at the top of the planter.
Then cut four pieces of twine the same length, depending on how long you would like your planter to hang. Tie each piece from the inside of once fabric strip to the inside of the next
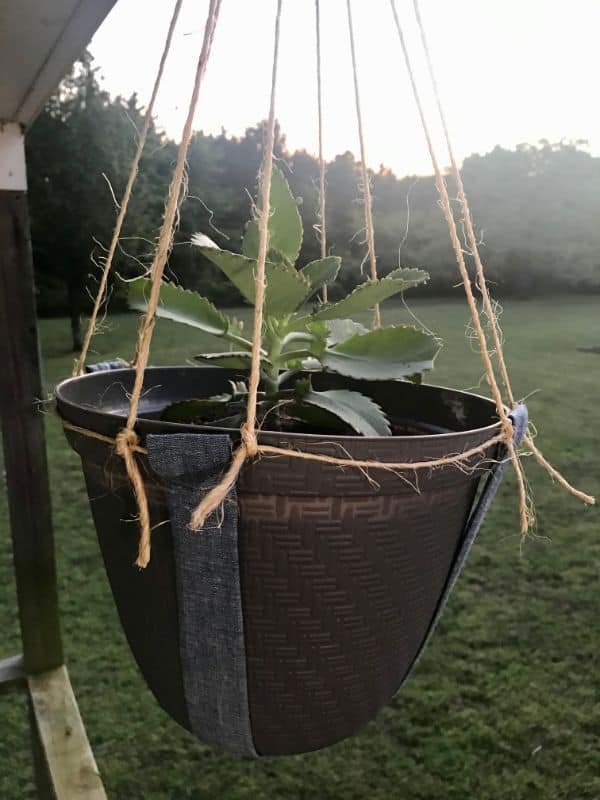
Your DIY hanging plant holder is ready to hang!
DIY Hanging Plant Holder
How to make a hanging plant holder with fabric and twine or rope.
Materials
- Fabric of choice
- Twine
- Planter
Tools
- Measuring tape
- Scissors
- Sewing clips
- Safety pin
- Iron and ironing board
- Rotary cutter and cutting mat (optional)
Instructions
- Measure plant from one edge, around bottom, to other edge
- Cut two strips of fabric 3" by measured length + 4"
- Fold strips in half lengthwise
- Clip to hold
- Sew with 1/4" seam allowance
- Turn strips right side out
- Press with seam running down center of strip
- Fold each end over 1/4", then another 1/4"
- Fold again 1" and press
- Stitch down bottom of fold twice
- Repeat for all fabric ends
- Lay strips on top of one another, perpendicular, meeting in the center
- Clip to hold
- Sew a square where the strips meet
- Pin safety pin to end of twine
- Insert safety pin through all fabric casings
- Place planter in center on top of sewn square
- Bring ends to the top of the planter
- Knot twine to form a tight circle around top of planter
- Cut four pieces of twin in equal lengths
- Tie each end of the twine to the inside of a fabric strip
Notes
Do not use a fabric with stretch,
Twine can be substituted with rope.
Another pair of hands or small clamps are helpful for the last step.