
I may earn a commission if you click on links in this post and make a purchase.
Every fall my husband helps me gather leaves before they get too dry and crispy, and then I spend an afternoon dipping them in beeswax and stringing them up. It’s one of those simple seasonal projects that doesn’t take long but feels like a real marker of the season. The beeswax preserves the color surprisingly well and the finished garland lasts well into the winter season.

Make the garland as an ideal way to enjoy the autumn season.
For a family, make it a fun afternoon. Gather the leaves and have a warm drink afterward. Dip the leaves in beeswax together (the wax is hot work with small children to avoid burns) and string them up as desired.
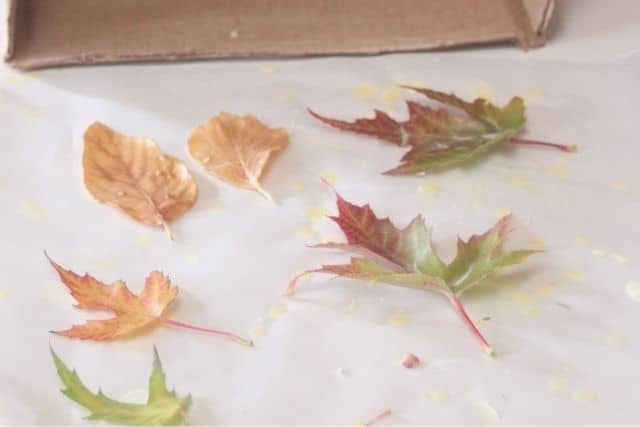
Gather Leaves
For this craft, choose leaves that are still rather supple, skip the ones that are already crispy dry.
Also, choose leaves that are still flat avoiding ones that have begun to curl.
Gather as many or as few as you’d like. There’s no right or wrong and no exact number to make it perfect.
A Box to Dry
While it is possible to dip the leaves and place them on parchment or wax paper to dry, the bit touching the paper tends to lose some of its luster.
It also means loss of a little beeswax which could lead to the leaves to brown rather than keep their color.
To combat this problem, it is best to hang the leaves to dry.
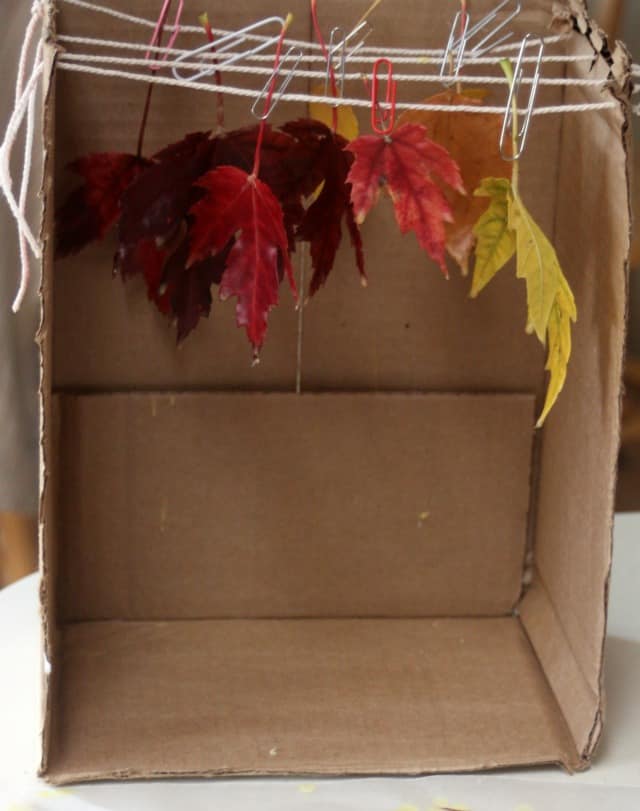
A cardboard box is perfect for this task.
Cut the flaps off one end of the box and open up one end completely.
On both sides of the open end, cut 1″ slits into the cardboard. Space these slits about 2 inches apart.
String some scrap yarn, garden twine, or other small cord through these slits. These will be the ‘clothesline’ for the leaves to drip and dry.
Other Supplies
You don’t need much here but it is wise to gather what you need in advance to keep the project moving smoothly.
Beeswax or Paraffin
The leaves will need to be dipped into some kind of wax to preserve them. I always have beeswax on hand, so I go for that.
Regular paraffin for making candles will work too. How much you need will depend on the amount of leaves to dip.
The wax can always be remelted and reused later if you start with too much.
A Double Boiler
A bowl over a saucepan with water in it works, it doesn’t have to be an actual double boiler.
You simply need a place to melt the wax and don’t want to do this over direct heat.
A note: wax of any kind is difficult to completely remove from a pot or bowl. Use something second-hand or not very good here and just use it for melting wax in again in the future. Don’t use something you will cook or eat from later.
Paperclips or Clothespins
You’ll need something to hang the leaves from the line to dry. I’ve found that clothespins are too heavy for the garden twine I use but paperclips work just perfectly.
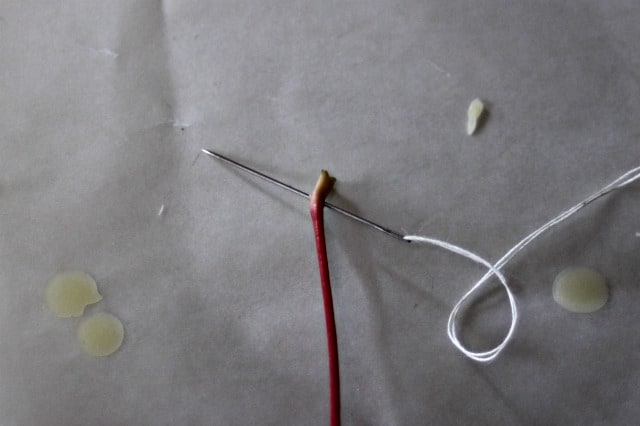
If you’re going to make a garland with the dipped leaves you’ll also need a fine sewing needle and some thread (I use cotton hand quilting thread but I imagine any thread would work).
Dipping the Leaves
Now that you have everything set up, let the fun begin!
Melt the wax in the double boiler, once melted remove from heat.
Do keep the water in the bottom of the double boiler on a low simmer, just in case you need to remelt the wax.
Hold the leaves by the stem and dip into the wax. Coat it completely. Shake off the excess wax and hang it to dry on the line (or place on wax paper). Repeat until all the leaves are coated.
It may be necessary to place the wax back over the water if it gets too cool and remelt. You’ll know when it’s getting too cool because it will clump on the leaves.
Let the leaves hang until dry and cool. An hour at the very most, likely much faster.
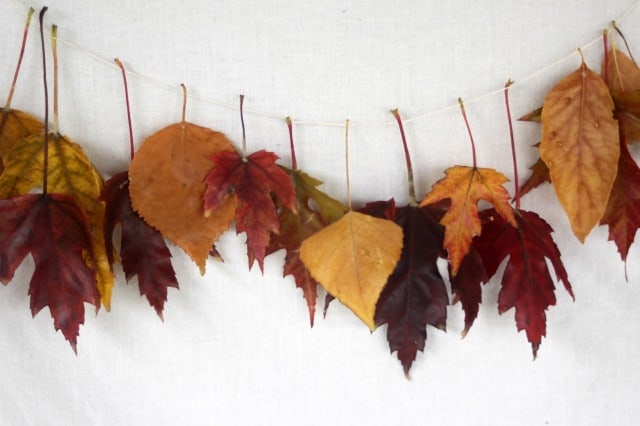
To Make Garland
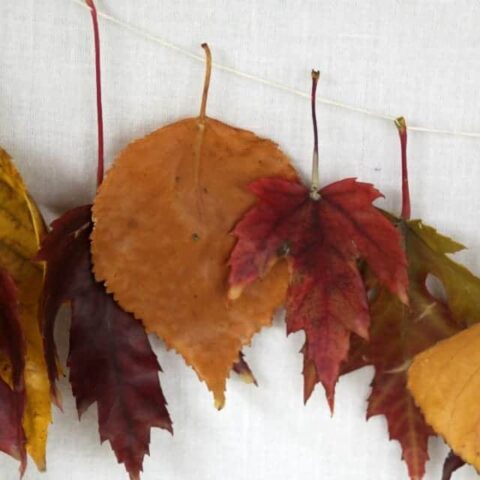
Using the thread and needle, carefully insert the needle through the stems of the leaves. Continue stringing until all the leaves are used up. Slide the leaves along the thread and space as desired. Hang from hooks and display proudly.
Other Craft Ideas with the Dipped Leaves
Spread them out onto table centerpieces. Fill a vase with them as another centerpiece. Glue a magnet to the back and stick to the refrigerator.
Before dipping, write names on the leaves with a permanent marker and then dip. Use those leaves as place cards for your fall feasts or even gift tags.
Make the most of those beautiful fall colors by preserving leaves with wax and displaying them proudly. It’s a great way to bring nature inside and celebrate seasonal living. Perhaps even more importantly, this is simple craft and fun for the whole family to enjoy together.
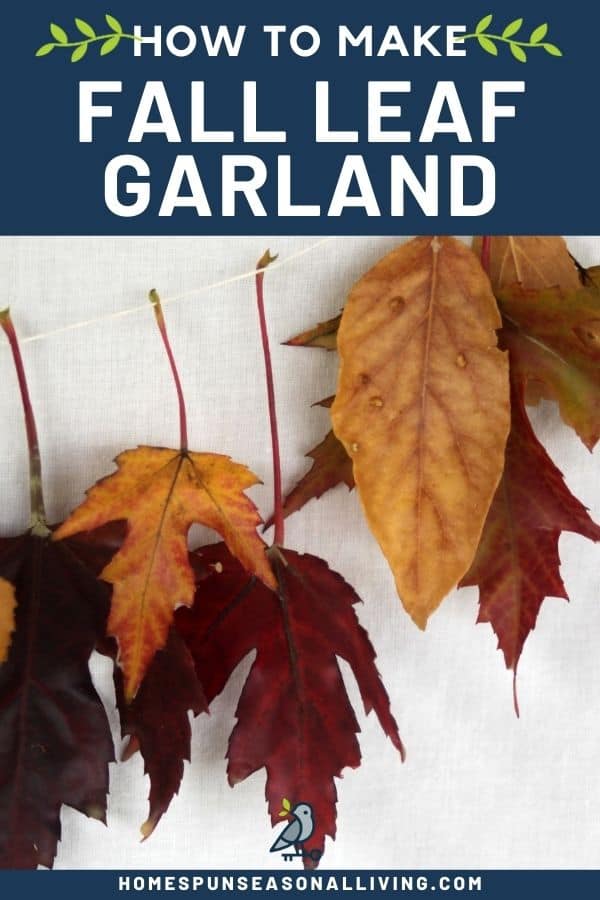
Beeswax Fall Leaf Garland
How to make a fall leaf garland using real leaves dipped in beeswax to preserve their color.
Materials
- Leaves
- Beeswax
- Cotton Thread
Tools
- Double Boiler
- Cardboard Box
- Paperclips
- Wax Paper
- Garden Twine
Instructions
- Gather leaves that are still supple and flat, avoiding any that are already crispy or curling.
- Set up a cardboard drying box by cutting slits in one open end and stringing twine through to create a drying line.
- Melt beeswax in a double boiler over low heat. Remove from heat once melted.
- Hold each leaf by the stem and dip fully into the melted wax. Shake off excess and hang from the drying line using a paperclip. Repeat for all leaves.
- Let leaves hang until completely dry and cool, about one hour.
- Thread a needle with cotton thread and carefully insert through each leaf stem. Space leaves as desired along the thread.
- Hang finished garland from hooks and display.
I’ve never dipped leaves but I’ll bet they’re very pretty. I’ll have to try it!! I have put different colored crayons in the wax along with some cinnamon oil and dipped pinecones. That’s cool too and they make great firestarters! Thanks for your post. I enjoy your blog.
I have done those firestarters too but it’s been a long while. Thanks so much for saying hello!
Oh this is wonderful! My granddaughter is in preschool this year and I’m her “grandparent helper” in the class because her parents have to work. I have to bring snacks at least one day a month, and the kids are learning to recognize their own names printed, and then the other kids’ names. I can see making these and writing each kid’s name on a leaf and placing it at their table setting, to take home with them! We have many beautiful maple trees. Also, I immediately thought that I could use my Clover Wonder Clips instead of paper clips – they are small plastic clips used for sewing and especially quilting – much smaller and lighter than clothespins and would be easier than paper clips!
Oh what a great idea, the wonder clips! You’re so smart. I hope you and the kids enjoy the craft!
Would this work with flowers?
I’ve never tried. the petals might stick together in the dipping process. You could sure try. If you do let me know how it works out.
Kathie, what a great project! We have so many lovely leaves right now. I think I will gather some and try this.
after drying them the same way, I would buy heavy waxed paper, put one sheet underneath the leaves and one on top ( yes, you can do more than one at a time ) and press them with the iron on low. We’ve done hundreds that way to literally trow them on the tablecloths as decoration for church suppers. Have fun
What a great idea!
I have soy wax, could I use it instead of going out to buy anything??
I’ve never tried it, but I can’t see why it wouldn’t work. For sure, give it a try.
How long do they last?
They will eventually start to fade, but will last for 6 to 8 weeks, maybe even longer.
I love this! What a fabulous idea for zero waste decorations. I’m definitely giving this a go.
I have done this before too, it always nice to make that special color last! Yours came out beautifully!
You never fail to inspire me. I am 71 years young and still doing all the seasonal stuff and gardening and my true passion is herbs. Thank you for all you do and enjoy the season.
How long do these last!?
It will absolutely vary the leaves will still get darker and decay this just slows the process down, I’ve had it last a good couple of months, however.
I live in Maine & my mom would visit every year. We would do this together! She’s been gone now & I continue to do this project with my kids & grandkids! However I have never done the garland & I will do that this year💗 we are having a beautiful foliage 🌻