
I may earn a commission if you click on links in this post and make a purchase.
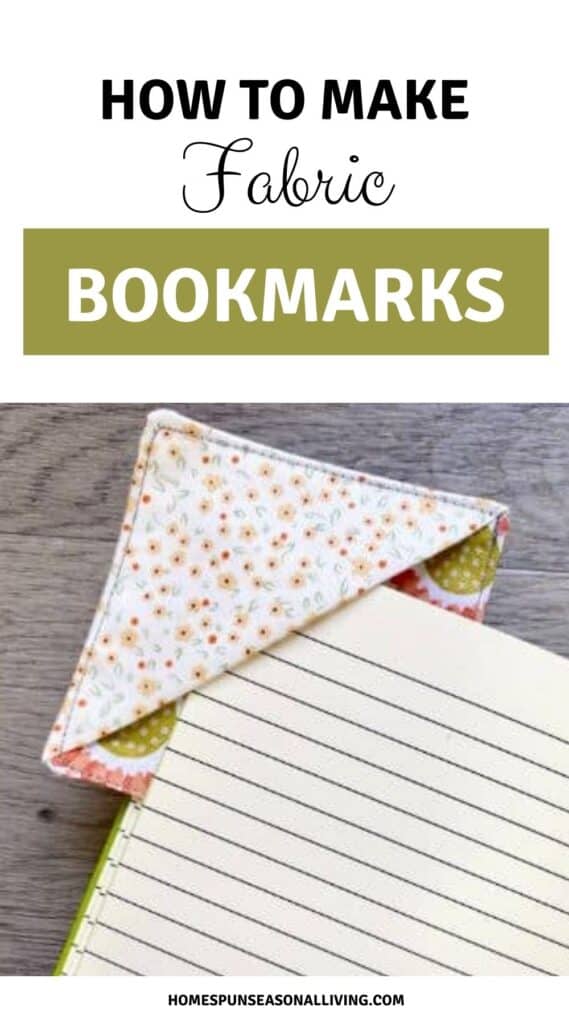
Fabric bookmarks are fantastic for using up fabric scraps leftover from other sewing projects. You don’t have to purchase anything to make handfuls of this adorable corner bookmarks that get a lot of use.
We use them for books that we are reading, of course, but they also come in handy to save our favorite recipes in cookbooks, hold the date in a planner, and mark a latest journal entry.
If you enjoy giving books as gifts, bookmarks are an easy sewing project for adding a personal touch. Choose fabrics that reflect the book and/or the recipient to make it thoughtful.
To add a little more, consider making a set of fabric coasters in coordinating fabrics to accompany your gift. It’s another great scrap buster project.
Fabric bookmarks only take about 10 minutes to make and go even faster in batches. You may as well cut out a bunch to keep on hand. It’s surprising how many uses we continue to find for these handmade bookmarks.
Supplies
- Fabric scraps
- Coordinating thread
- Rotary cutter and cutting mat or scissors
- Iron and ironing board
- Sewing machine
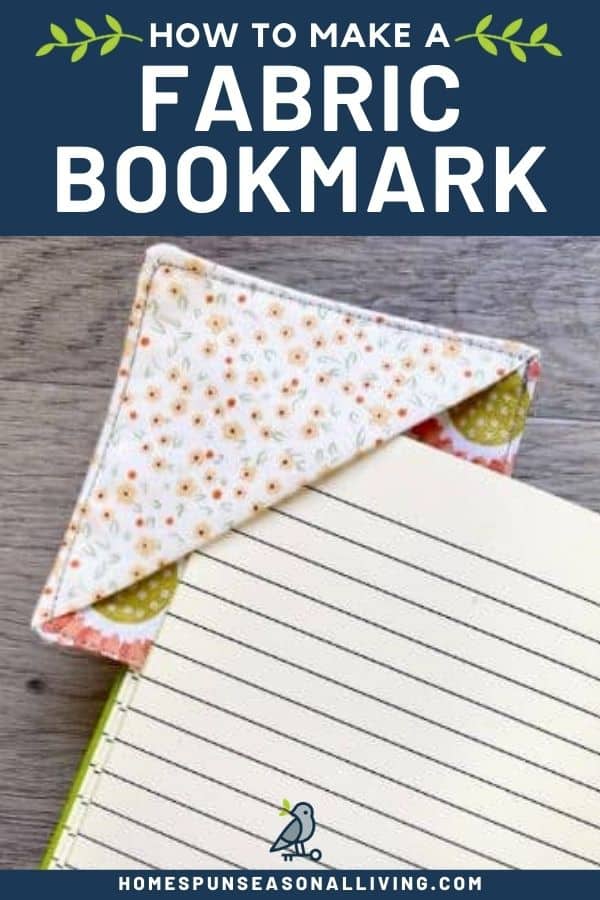
How to Make a Cloth Bookmark
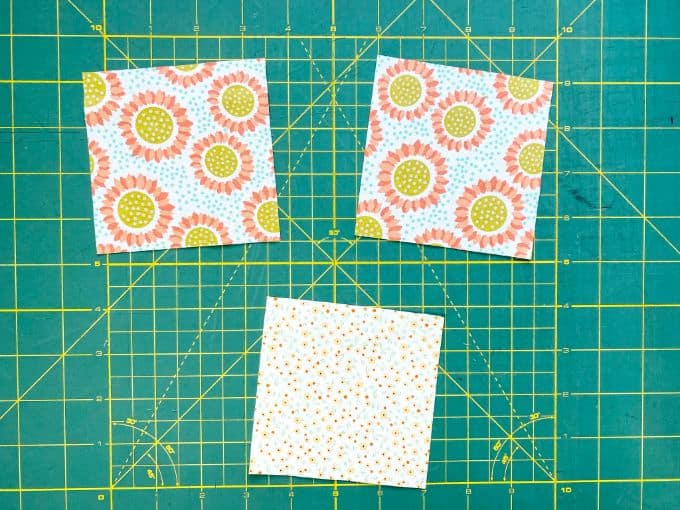
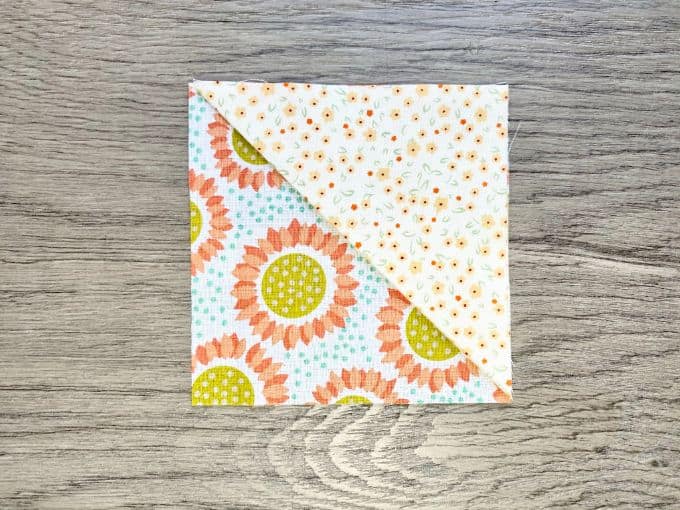
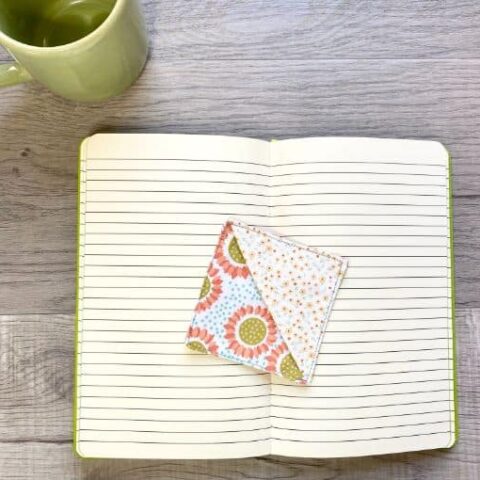
Begin by cutting three 4″ x 4″ squares. One will become the triangle, and the others will be the front and back.
Fold one of the fabric squares in half to form a triangle.
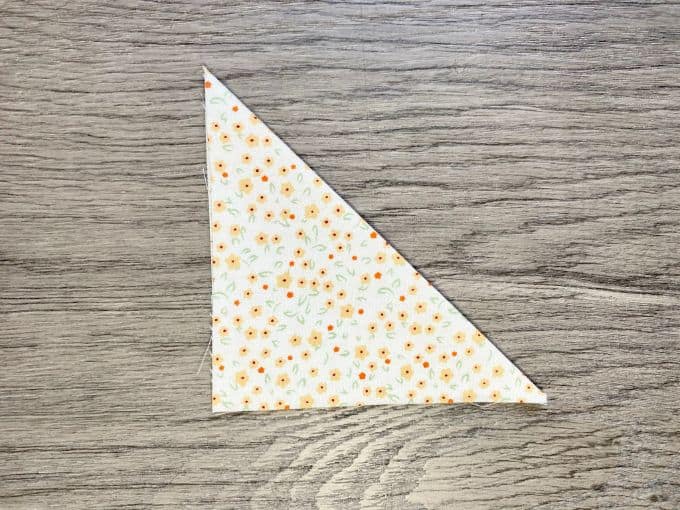
Lay the triangle on top of the fabric square that you would like on the front. The folded edge should be in the center with top and side edges aligned, all fabrics facing right side up.
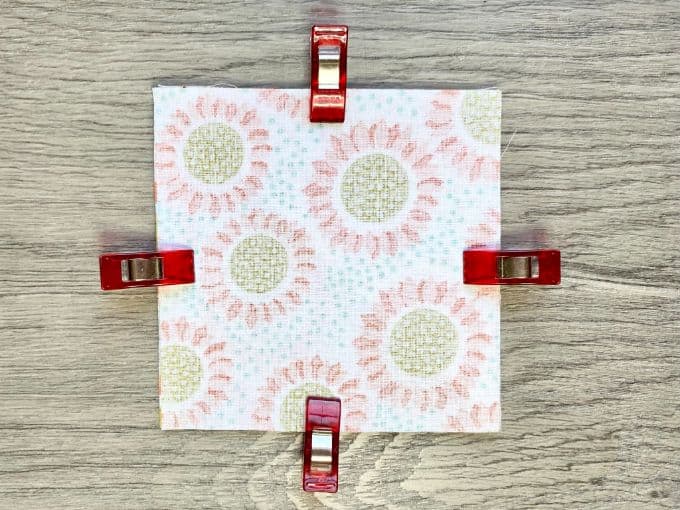
Place the remaining fabric square on top of the others with right sides together. Clip to hold.
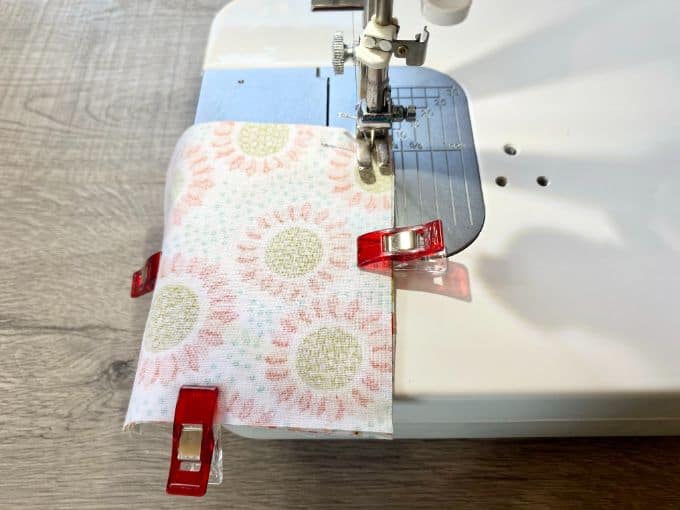
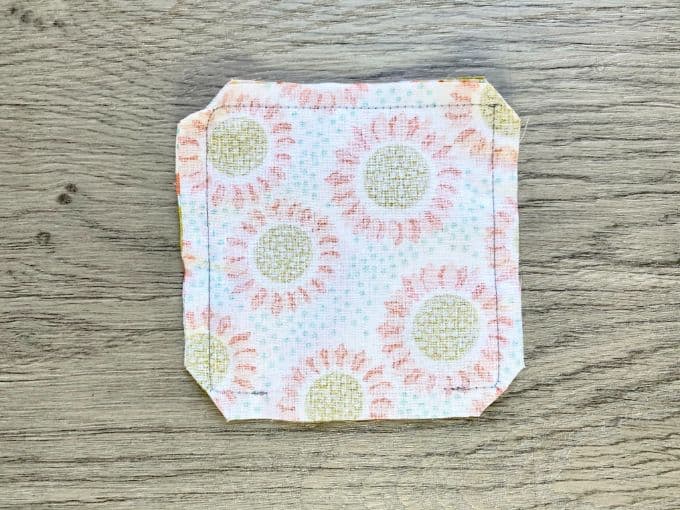
Sew around the perimeter with a 1/4″ seam allowance leaving a 2″ opening at the bottom.
Snip each corner with scissors to reduce bulk. Be careful not to cut through any stitches.
Reach through the opening to turn the bookmark right side out. Use a turning tool or chopstick to gently press out the corners.
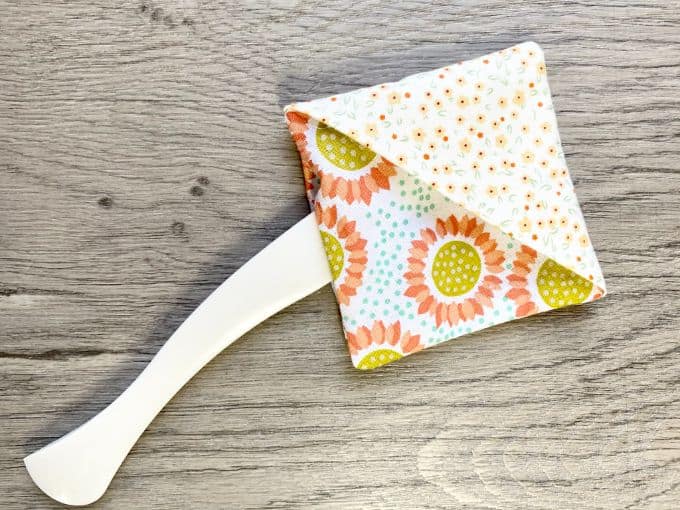
Press well.

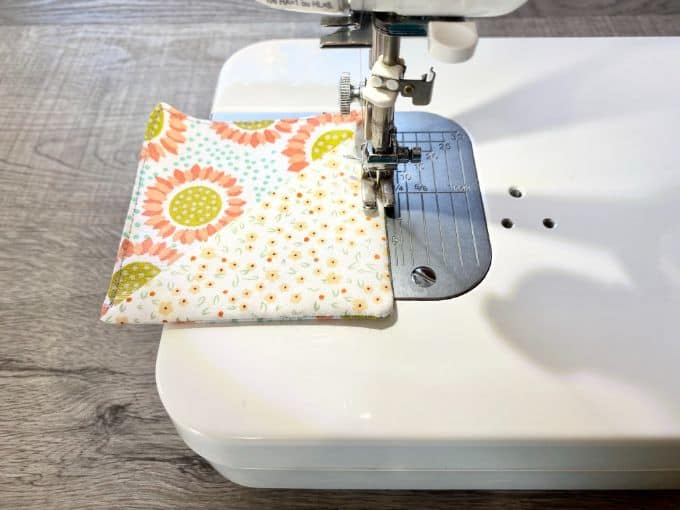
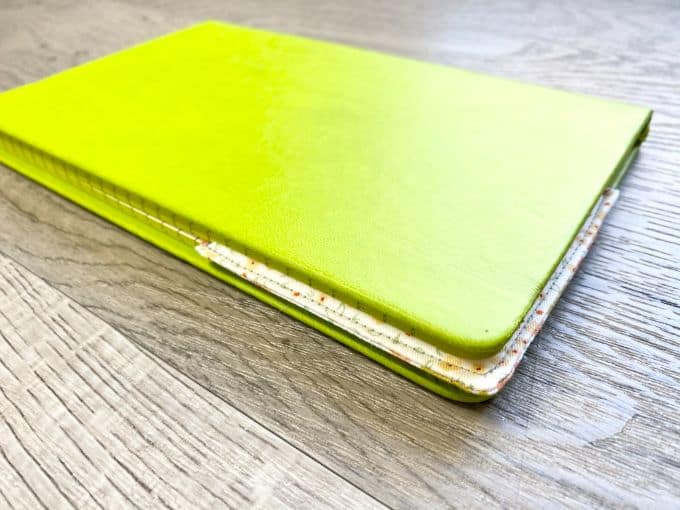
To finish, top stitch all the way around the perimeter of the bookmark.
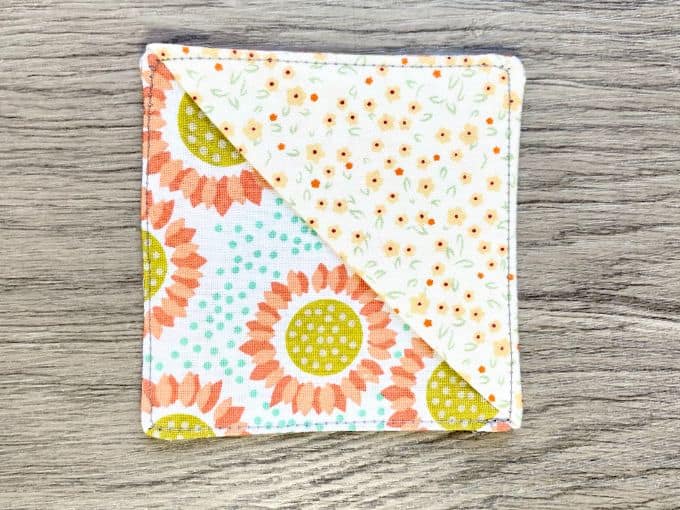
If the edges begin to curl up, give it a press again. Otherwise, your corner bookmark is complete.
Now that you have the concept down, try making reusable makeup remover pads. The process is nearly identical, but it uses softer fabrics for the face.
Use and Care
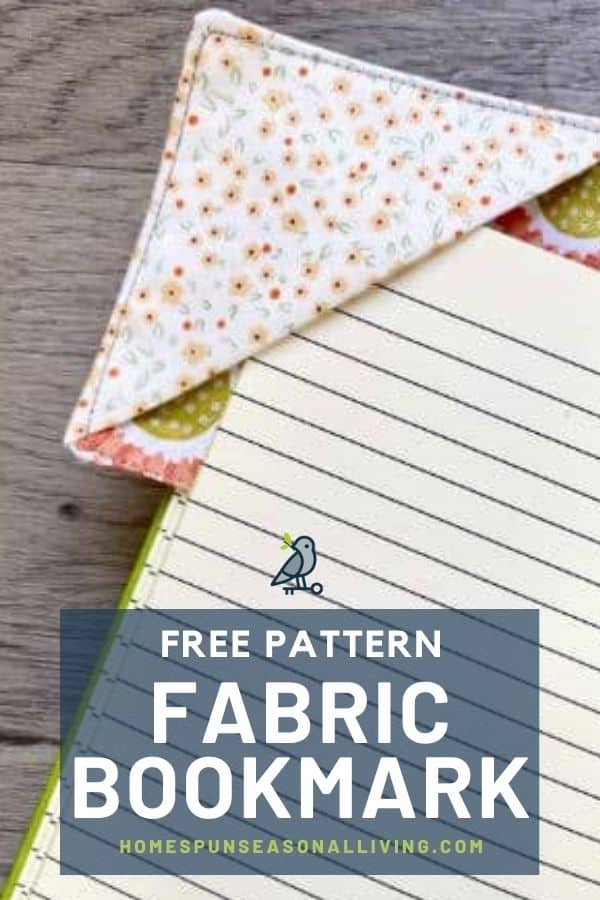
To use the bookmark, slip a few pages into the triangle pocket with the page you are holding for later facing up.
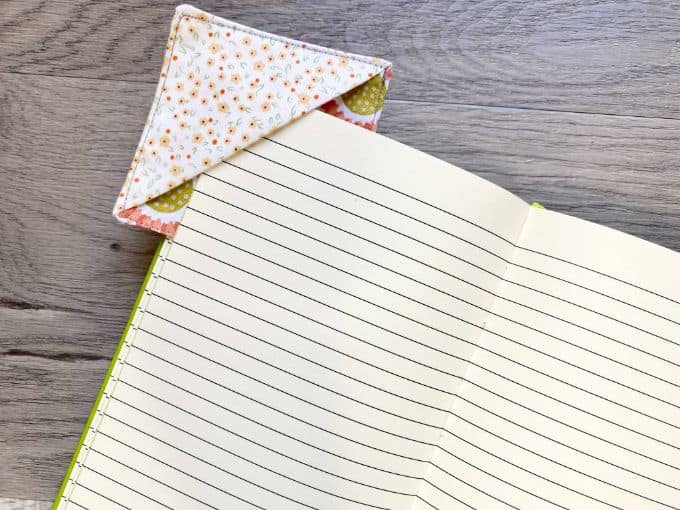
Then close the book, and come back to your reading later.
If needed, you can wash and dry the bookmark. It may need another press after drying.
Fabric Corner Bookmark
How to use fabric scraps to make a corner bookmark.
Materials
- Fabric Scraps
- Coordinating Thread
Tools
- Rotary Cutter and Cutting Mat (Optional)
- Scissors
- Sewing Clips
- Iron and Ironing Board
- Sewing Machine (or hand sewing needle)
Instructions
- Cut three 4" x 4" squares
- Fold one square in half to form a triangle
- Place triangle on top of another square, fold at center, top and side edges aligned
- Add remaining square on top with right sides together
- Clip to hold
- Sew around square with 1/4" seam allowance leaving 2" opening at bottom
- Snip corners
- Turn right side out
- Press
- Top stitch all the way around
Love love love. Will sure help me this year with gifts. THANK YOU. GOD BLESS.
Easy and fun to make! 10/10 would recommend! Thank you for all your hard work!
Oh so glad to hear it!