
I may earn a commission if you click on links in this post and make a purchase.
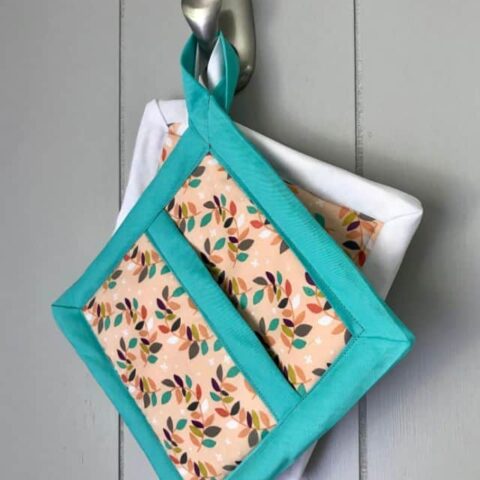
Hot pads are necessary for every kitchen and get a lot of use. They are probably something you don’t pay much attention to though. If yours are getting a bit tired, learn how to make pot holders yourself with this easy tutorial.
Frequent use can wear them out and leave hot pads looking dingy and flat. This easy hot pad sewing pattern only uses a fat quarter of fabric for two, and you are sure to find some that coordinate with your kitchen.
Pot holder patterns are also great for using up leftover fabric, batting and binding scraps from quilt making. Just make sure all your materials are 100% cotton.
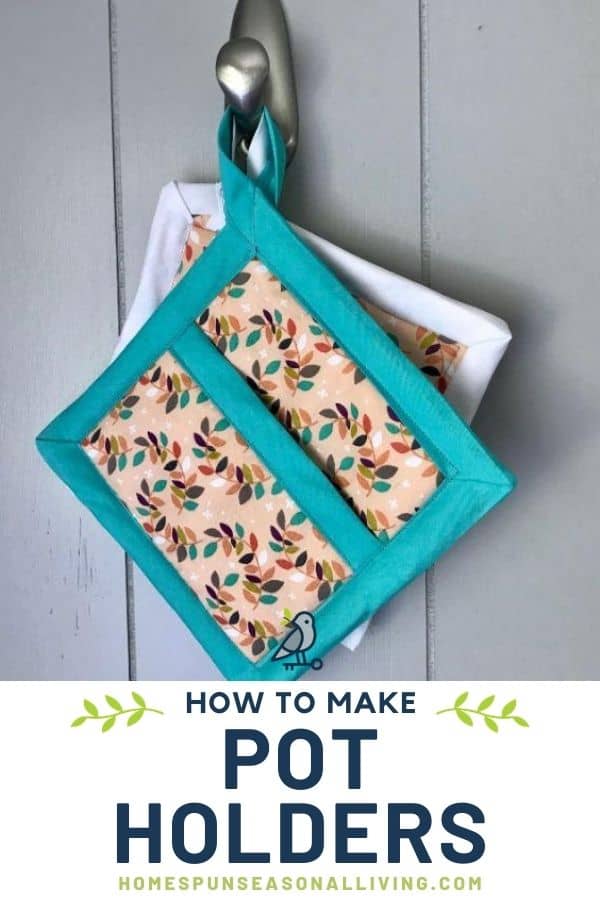
This design features a pocket for your hand and 1″ binding to make sure it holds together through heavy use. Read on to learn how to make pot holders.
Other materials can be flammable, and you don’t want to run that risk when using hot pads to remove items from the oven.
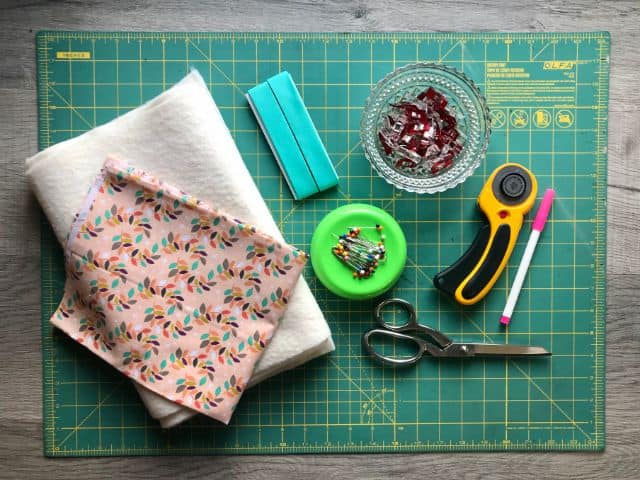
Supplies
- 1/4 yard 100% Cotton Fabric (fat quarter)
- 1/4 yard 100% Cotton Batting
- 1.5 yards 1″ Double Fold Bias Tape
- Coordinating Thread
- Fabric Shears
- Rotary Cutter
- Cutting Mat
- Acrylic Ruler
- Straight Pins
- Sewing Clips
It is important to ensure that all your materials – the fabric, batting and bias tape – are made of 100% cotton. Other materials can be flammable, so you don’t want to put them in an oven!
How to Make Hot Pads
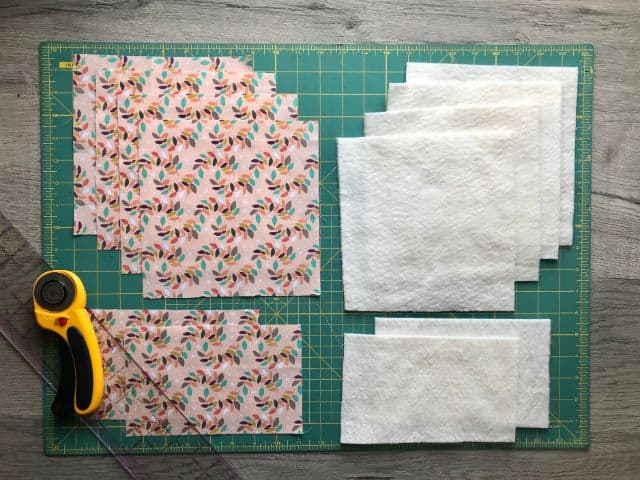
Begin by washing and drying your fabric. Then follow this easy way to square fabric. Now your fabric is ready to cut.
To make one pot holder, cut the following:
- (2) 8″ x 8″ fabric
- (2) 8″ x 6″ fabric
- (2) 8″ x 8″ batting
- (1) 8″ x 6″ batting
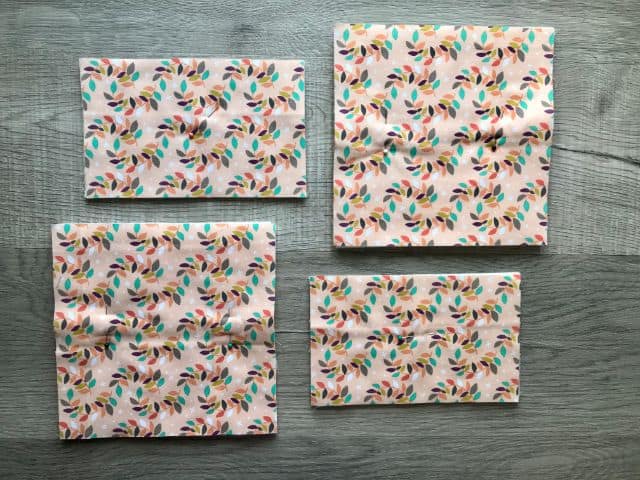
Next, layer one fabric square right side down, two squares of batting, and top with the remaining fabric square, right side up.
Insert a straight pin or two to hold all the layers in place.

Do the same with the rectangle pieces, but only include one piece of batting. This is similar to sandwiching the layers of a quilt before quilting it.
Repeat if you are making two pot holders.
Now stitch around the perimeter of each sandwich with a 1/4″ seam allowance.
If you find that the layers are too thick for your sewing machine, you can switch to a walking foot or even feed foot. The special foot will feed both the top and bottom layers through the machine at the same time.
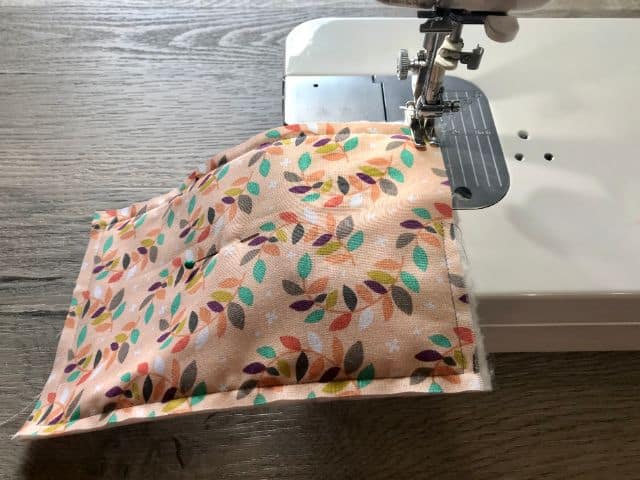
When approaching a corner, lift the presser foot and turn the fabric toward you. Continue to sew down the next edge.
Repeat until all your fabric sandwiches are stitched.
The fabric layers may shift slightly while sewing. Use fabric shears to trim any corners and edges.
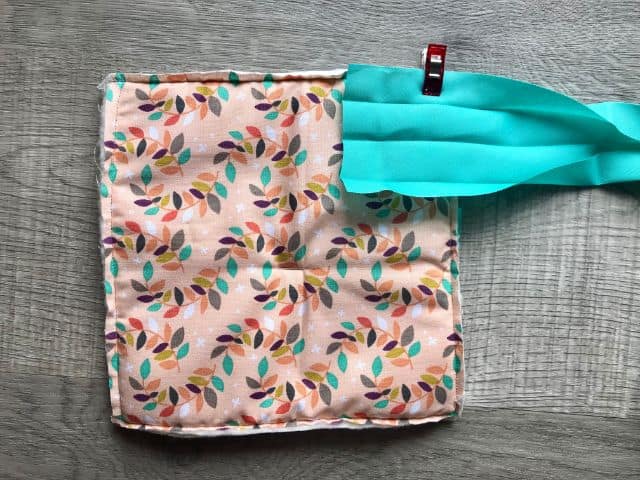
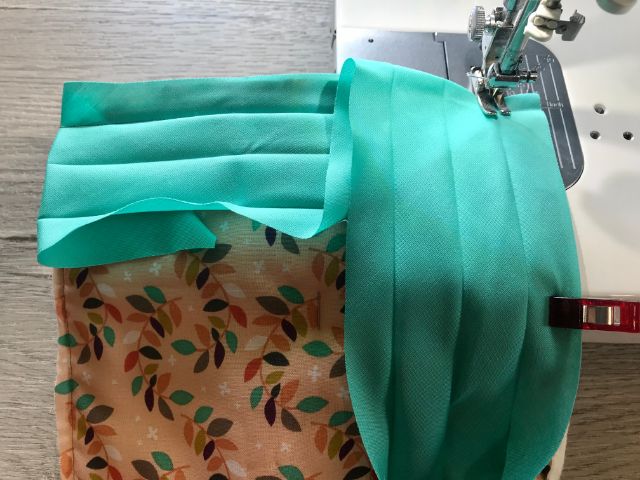
Next, cut a length of double fold bias tape to 9″.
Insert the longer side of a rectangle sandwich in the center of the bias tape, and clip to hold.
Top stitch along the bottom edge of the bias tape.
Now trim the ends of the bias tape so they are flush with the rectangle.
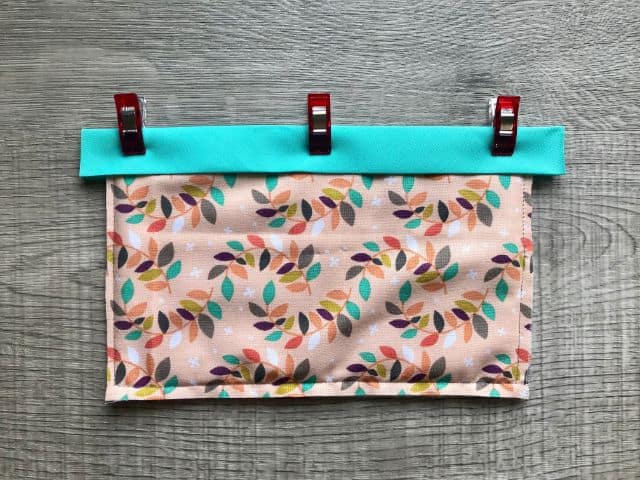
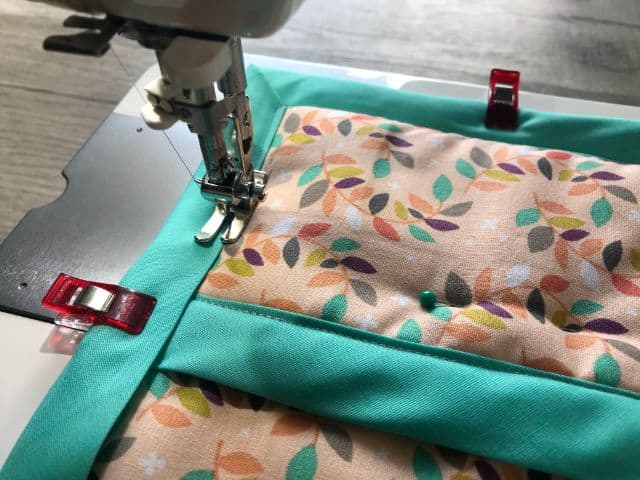
Place the rectangle on top of a square sandwich with the bottom edges aligned. Pin to hold.
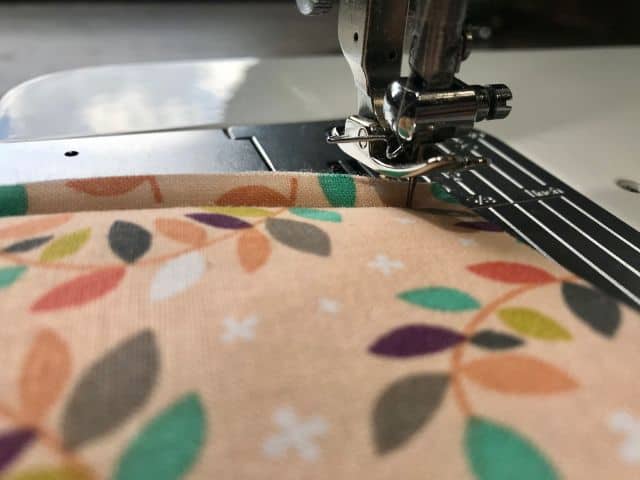
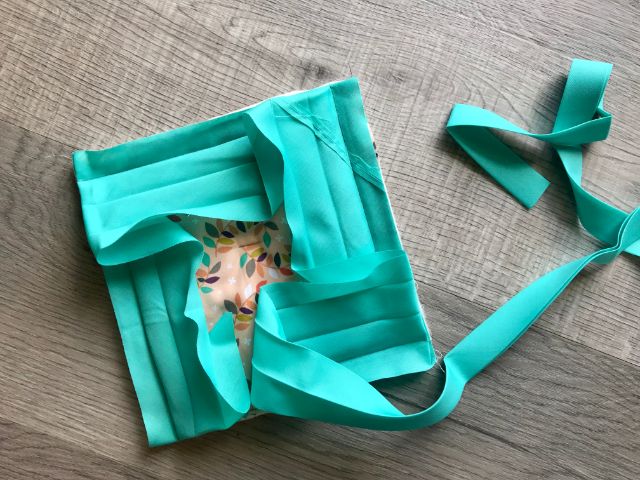
Flip it over to the back. Open up the bias tape, and attach it to the top left corner with a clip, approximately 2.5″ from the edge.
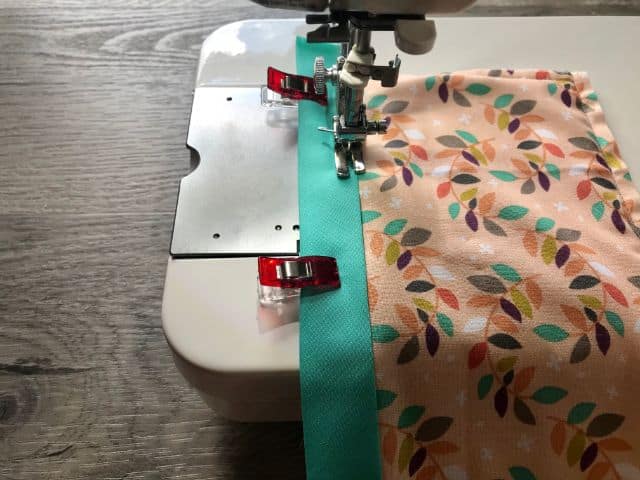
Sew along the top fold line. When approaching a corner, stop 1/2″ before the edge and lift the presser foot.
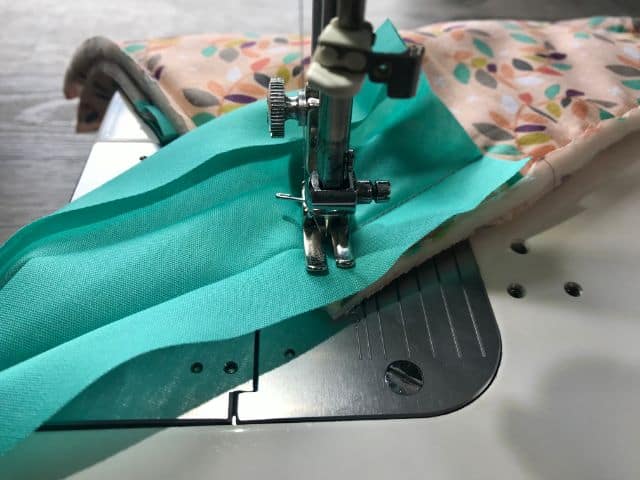
Turn the fabric so that the corner is pointing at you. Then continue to sew to the corner and off the fabric.
Now pull the bias tape up to meet the edge where you began stitching it. Clip to hold.
Continue sewing down the fold line.
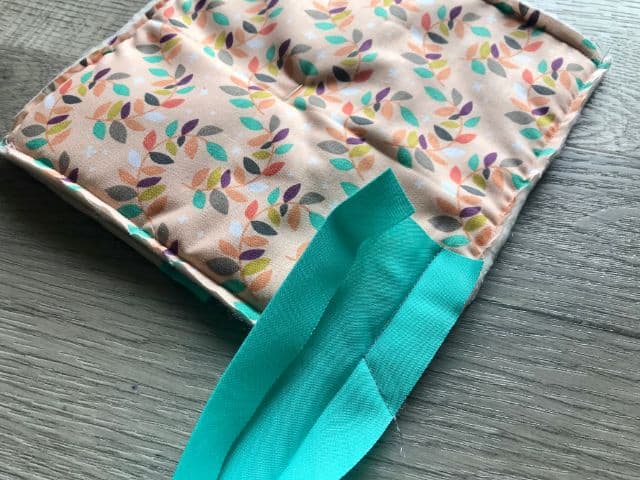
Repeat for all four corners and sides. Then stop sewing 1″ before meeting the beginning of the bias tape. Leave the remaining bias tape attached.
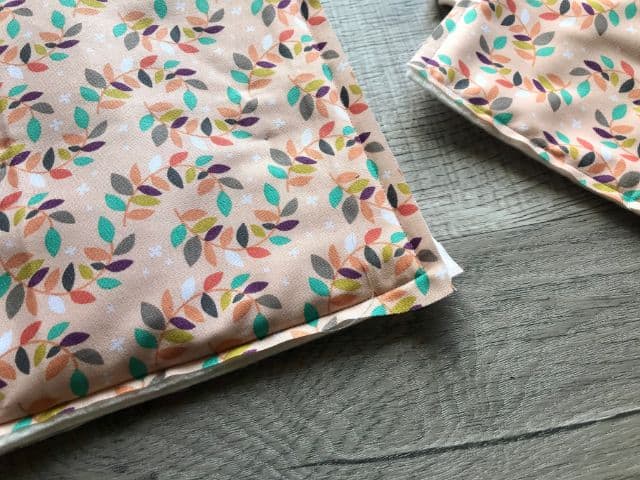
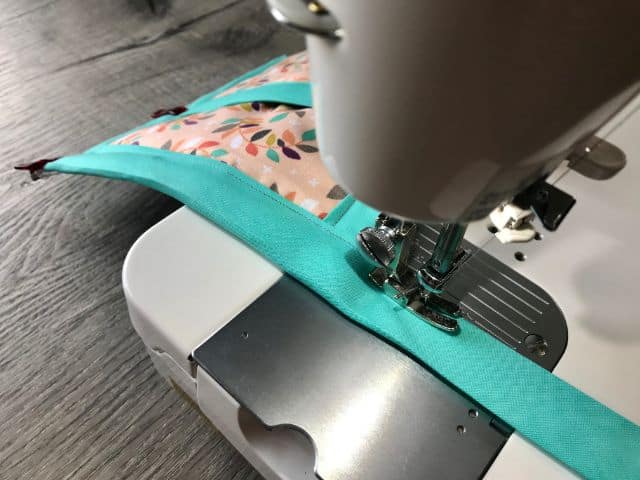
Next, pull the bias tape around to the front of the pot holder. You can see how the corners are mitered since you stitched to each corner.
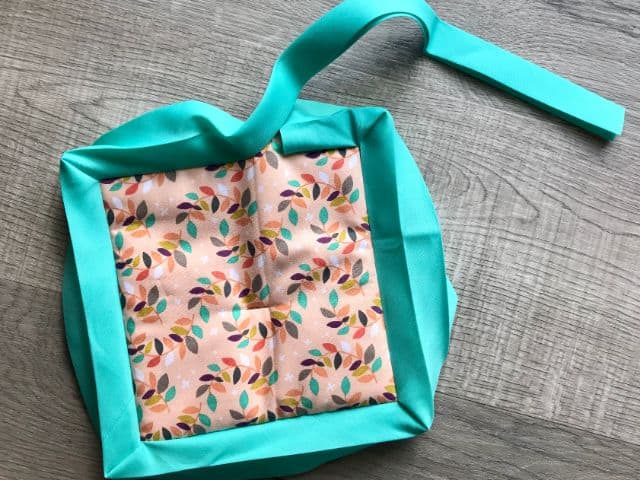
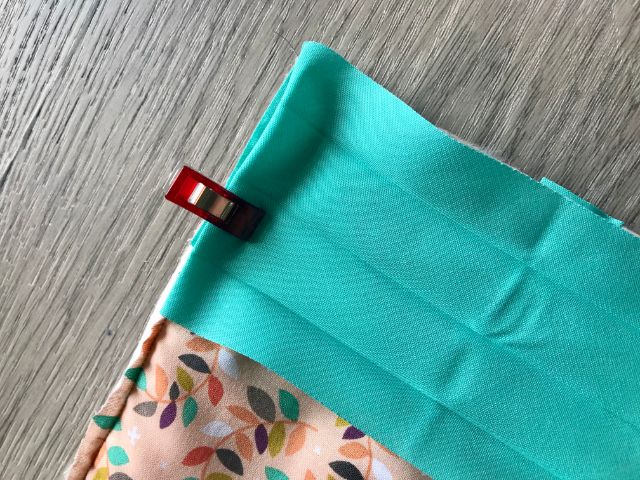
Fold the bias tape onto itself, and clip it along the front.

Take care to form miters on the front corners as well.
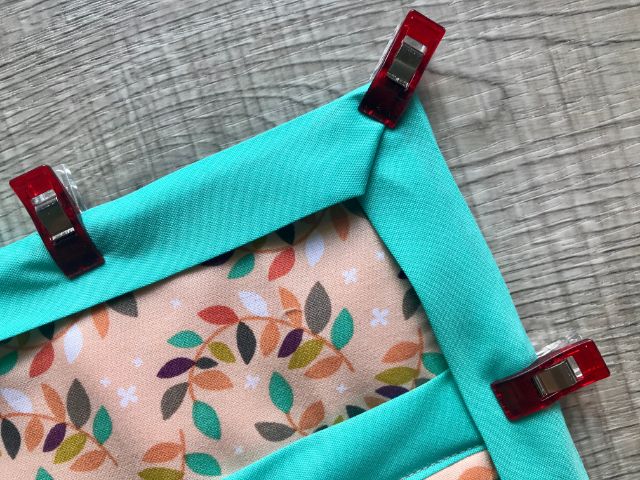
Now top stitch along the front of the bias tape all the way around the perimeter.
When you get to the tail of the bias tape, continue sewing across the top of the pot holder and along the open edge of the bias tape until you reach the end.
Now twist the bias tape tail into a loop that ends at the back of the pot holder. Clip to hold.
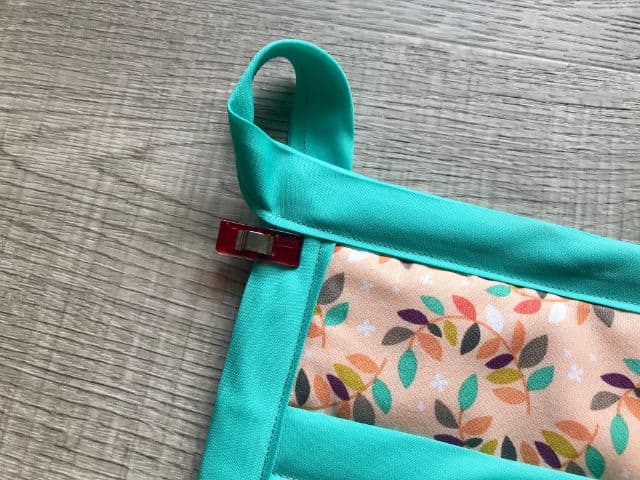
Finally, sew the loop in place. You can see in the photo below where we chose to stitch at an angle to match the other corners.
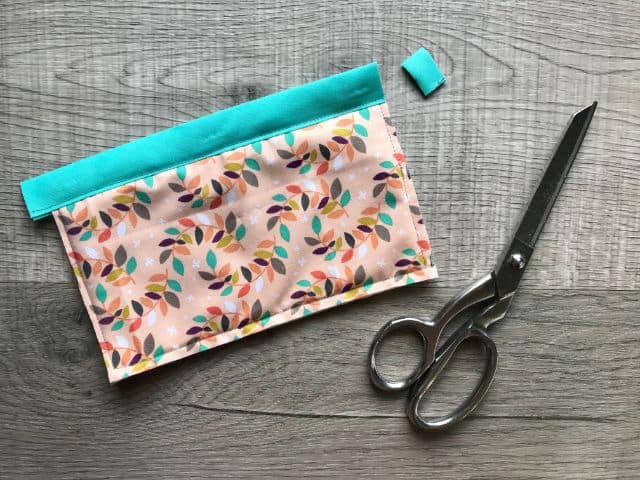
Trim any excess bias tape from the back with fabric shears.
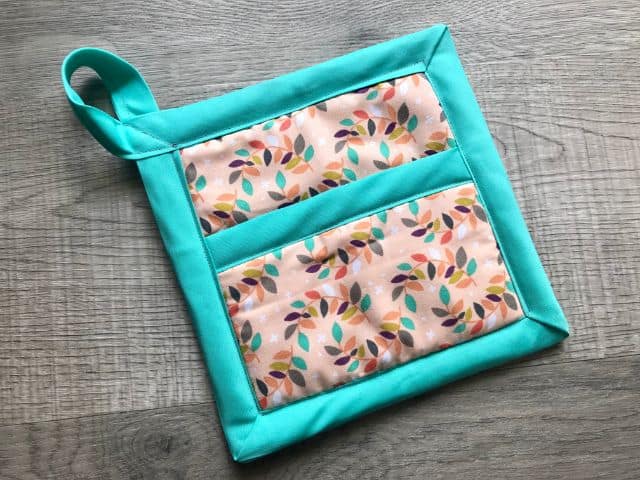
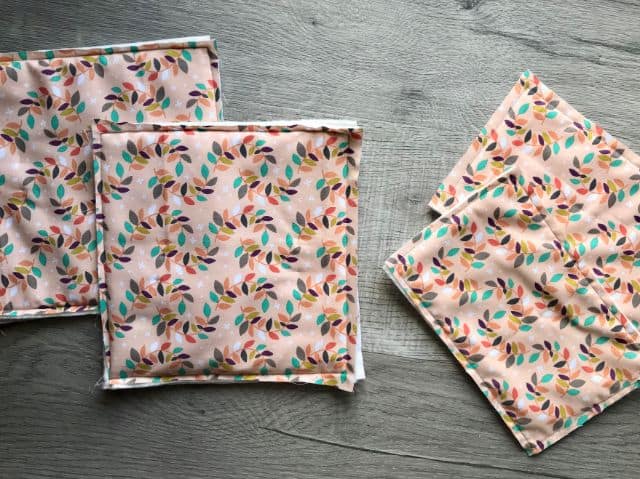
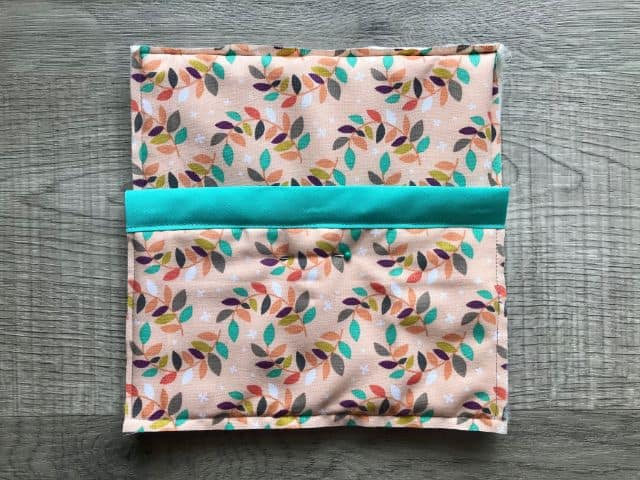
You made a pot holder!
How to Make Pot Holders
How to make pot holders to handle hot items in the kitchen.
Materials
- 1/4 yard 100% Cotton Fabric (fat quarter)
- 1/4 yard 100% Cotton Batting
- 1.5 yards 1" Double Fold Bias Tape
- Coordinating Thread
Tools
- Fabric Shears
- Rotary Cutter
- Cutting Mat
- Acrylic Ruler
- Straight Pins
- Sewing Clips
Instructions
- Wash, dry and square fabric
- Cut dimensions for one pot holder: (2) 8" x 8" fabric; (2) 8" x 6" fabric; (2) 8" x 8" batting; (1) 8" x 6" batting
- Layer fabric square right side down, two squares of batting, and fabric square right side up on top
- Pin to hold
- Repeat for rectangle pieces
- Sew around perimeter of each with 1/4 seam allowance
- Trim as needed
- Cut bias tape to 9"
- Place long side of rectangle between bias tape
- Clip to hold
- Stitch along bottom of bias tape
- Trim ends of bias tape
- Place rectangle on top of square, bottom edges aligned
- Pin to hold
- Flip to back
- Open bias tape
- Place at top left corner 2.5" from side
- Sew along top fold
- Stop sewing 1/2" before reaching the corner
- Lift presser foot
- Turn fabric so corner is facing sewer
- Sew to corner
- Pull bias tape up to meet top edge where you began sewing it
- Clip to hold
- Continue sewing down fold line
- Repeat for all four sides
- Stop 1" before the reaching the beginning of the bias tape
- Leave bias tape tail in tact
- Pull bias tape to front of pot holder
- Fold bias tape and arrange on front
- Clip to hold
- Top stitch bias tape all the way around front
- Continue sewing tail across top of pot holder and along remaining bias tape
- Twist bias tape into loop ending at back
- Clip to hold
- Sew loop in place
- Trim bias tape
Notes
Only use 100% cotton fabric, batting and bias tape for this project. Other materials can be flammable.
Thanks so much for the pot holder instructions. I love the pictures you showed how it would look. You did an awesome job. I’m definitely making those. I love the clips you use, sure beats using pins. Merry Christmas