
I may earn a commission if you click on links in this post and make a purchase.
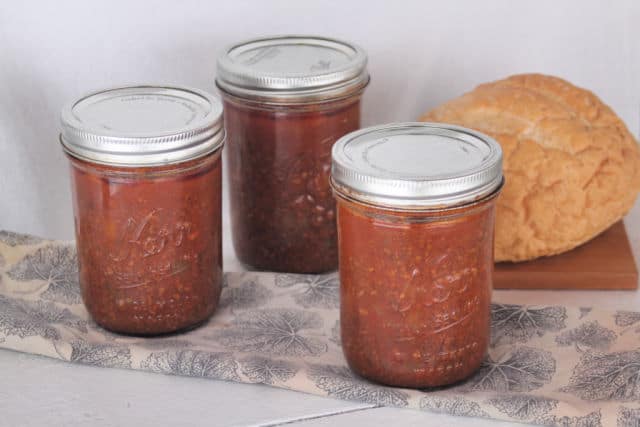
I’ve been canning sloppy joe filling for at least fifteen years and it remains one of the most practical things in my pantry. On a busy night it means dinner is ready in the time it takes to reheat the jar and toast a bun — no processed ingredients, no last minute scramble. I make it in winter when the garden rush is over, using tomato sauce canned over the summer and bell peppers pulled from the freezer. It’s one of those projects that makes the whole preserving system feel worth it.
Sloppy Joes are endlessly appealing it seems to kids and adults alike. They can take on many forms and flavors and whip up so easily both for the canning process and for reheating later. Some bread and vegetables on the side and dinner is ready in a flash.

The Perfect Winter Preservation Project
Most of us probably do our preserving when vegetables are coming in from the garden but canning sloppy joe filling is a great winter project. Use tomato sauce and ketchup that was canned over the summer as well as the beef broth that was put up earlier. Use chopped and frozen bell peppers here too, if available. Don’t have homemade versions? Store bought will work just fine.
Keep It Frugal
I buy a half a grass-fed cow every fall. There’s a lot of ground meat in that and so it’s the meat I use as a base for my sloppy joe filling. However, use whatever ground meat you have on hand – use wild game, venison is quite tasty here. Ground turkey or chicken work well too. A mix of different meats is good too, I’ve been known to use ground beef and a little Italian sausage on occasion. Match the broth in the recipe to the ground meat used.
Beef broth in the filling does add a certain depth of flavor to these sloppy joes, however; if none is available and frugality is of concern, use plain water. The water will create a delicious filling, too.
Pressure Canning
Meat must be pressure canned. It is simply unsafe to can it in a boiling water bath. A pressure canner is an expensive investment but one that will likely last you a lifetime and will easily pay for itself over time with meals like this at the ready. Please, I’ve seen the old articles and books, even seen it mentioned online now and then about canning meat for something like 3 hours in a boiling water bath – don’t, just don’t. Use a pressure canner.
How to Serve
Sloppy joes are meant to be casual and filling. Pour the jar into a saucepan and reheat gently.
Spoon the heated filling on top of buns, toast, bread, even rice, baked potatoes, or noodles.
Serve alongside a salad or some other canned vegetable like canned green beans for ease.
How to Make Sloppy Joe Filling
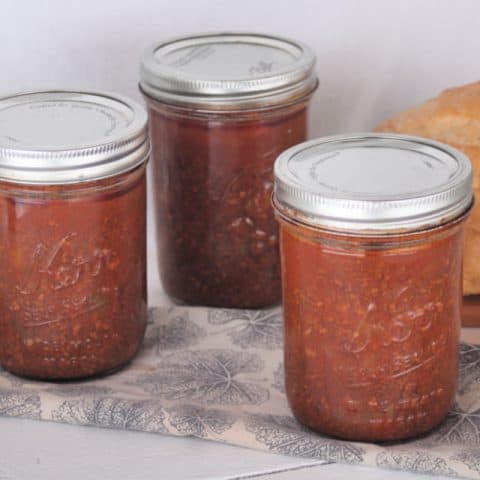
Make and can sloppy joe filling to have a quick and homemade meal ready in the pantry without the dubious ingredients of processed store-bought versions.
Ingredients
- 4 Pounds Ground Beef
- 3 Cups Onion, chopped
- 1 ½ Cups Bell Peppers, chopped
- 2 Cups Ketchup
- 2 Cups Tomato Sauce
- 2 Cups Beef Broth or Water
- 1 Tablespoon Salt, more or less to Taste (use less if using salty broth)
- 1 teaspoon Ground Black Pepper
- 1 Tablespoon Yellow Mustard
Instructions
Make Sloppy Joe Filling
- Brown the ground beef. Drain off the fat.
- Put the beef and remaining ingredients into a large pot. Stir well.
- Bring to a boil and simmer 5 minutes.
How to Can Sloppy Joe Filling
- Fill jars with hot sloppy joe filling. Leave 1″ inch headspace. Remove air bubbles and wipe jar rims. Secure lids and bands.
- Process pints for 75 minutes, quarts for 90 minutes at 10 pounds of pressure. Adjust the pressure based on elevation and style of canner. I can mine at 15 pounds of pressure, for example. The National Center for Home food Preservation has a handy chart if you’re unsure.
- Let jars cool and check seals. Remove rings and store sealed jars in the pantry. Store any unsealed jars in the refrigerator and use within a week or freeze for use later.
Notes
To Use
Pour the filling into a pot, cover, and bring to a simmer. Heat through. Serve on bread or buns, over rice or noodles.
What a great idea….thanks. I can cubes of beef and jars of mixed veggies from the garden. On a busy day I grab a jar of each, plus some homemade stock that’s canned and hey presto…..instant stew, even better when I have leftover potatoes in the fridge to cut up and add. Goes nicely with some fresh homemade bread or biscuits.
So smart and tasty!
I do the same thing! So, nice to have our gardens’ bounty all year long!
Also, I can many different beans to quickly throw together a chili to heat and serve. Nice on those busy days or unexpected company!
I love to can beans too!
How many pints does this recipe make? 5? I’m definitely going to do this but trying to decide if I double or triple the recipe. Thanks!
It makes 8 pints (the top of the recipe card shows the yield).
This sounds great! Just wondering, I’ve read that one must cook home-canned meats for more than 10 minutes at a boil before serving to ensure food safety. Do you do this? It turns my food to mush!
No, I don’t and if you canned everything properly you don’t need too either http://digitalcommons.usu.edu/cgi/viewcontent.cgi?article=1337&context=extension_histall
Just made this Sloppy Joe Filling, I doubled the recipe to have extra jars and added garlic. I liked the flavor and consistency. It’s in the pressure cooker now! Thanks for the idea and recipe!
So glad to know you liked it! Thanks for trying it and reporting back.
I made this, left 1″ headspace and when in pressure cooker, it bubbled over and through the seals. My steam water is orange because of the leaks. Are they still okay?
Did you have much variation in the pressure while it was in the canner? Pressure fluctuations can pull water from the jar.
Either way, as long as the jars sealed properly – it’s fine to put in the pantry and eat.
Is there a recipe for the sauce without the meat? I don’t have a pressure canner. That way I could can the sauce and just brown the meat and heat up the sauce when I’m ready to eat Joe’s.
I don’t have one. I suppose you could just make the sauce with the meat and try canning that but there’s enough low acid ingredients in there that you’d want to test the ph first. Certainly, don’t suggest using beef broth in a water bath canner.
@Tina, There is a recipe you can google called sloppy joe starter sauce. The recipe if from Ball.
I WOULD LOVE TO TRY THIS WITHOUT ADDING THE MEAT. DO YOU HAVE ANY IDEA ON HOW LONG I SHOULD PRESSURE CAN THIS?
Onions need 40 minutes in the pressure canner and the conventional canning wisdom is to always can for the ingredient that takes the longest amount of time.
I have never used a pressure canner i have only used a cold pack. Can it be done with a cold pack.Please let me know.
[email protected]
Meat must always be canned in the pressure canner. Always. You could freeze this but the only safe way to can it is to do it in the pressure canner.
Thanks for the recipe. I am also trying to use up ground beef from the last cow I sent. I can only so far find recipes for taco meat and of course spaghetti meat sauce. Do you have any other ground beef canning grecipes you could share?
@Lexi, my sister-in-law cans up taco meat. I’m going to do this too!
How many jars did this recipe yield
It makes approximately 8 pints. It does say that with the recipe, It’s a bit small I know. I’ll work on fixing that.
How long can I keep this? What would be the expiration date ? Sorry new to this.
All home canned goods should be used up with 1 year.
I made this and the flavor is wonderful but the consistency is a bit runny for buns. Any ideas on how I can thicken it when I warm it up?
Try boiling the excess water out a bit when you heat it. Or maybe add just a little tomato paste for thickening.
Allergic to peppers. What else could I use?
You could for sure just skip the peppers entirely or add more onions.
How much water do I put on the bottom of the pressure canner to do 19 pints? I doubled your recipe.
How much water in the bottom of the pressure canner is specific to the canner – you’ll need to read your owner’s manual for that information.
Does this come out thick or is it runny?
It’s somewhere in the middle and will vary greatly depending on the thickness of your tomato sauce and ketchup.
Oh wow! This was great! I made some last night but didn’t want to can it with the meat. I kept it as just the sauce and would have it as an easy meal to then add to the meat when I have ground beef. One of the cans didn’t seal so we had sloppy joes tonight for dinner. We all loved it, my husband said not to change a thing and we could have this once a week and he’d be happy. I had a almost 1 1/2 pounds of ground beef and had the excess sauce that didn’t fit and the pint that didn’t seal. Probably a pint of sauce:a pound of beef in our future. :)
I’m so glad to know this, thank you for telling us what you did.
I have never pressure canned. I usually hot pack everything I can. I thought about doing it this way, any reason why I shouldn’t? If meat is cooked, why would it need pressure canned?
It’s not about cooking. It’s about acidity level in canning. Meat is low acid and like all low acid foods a pressure canner must be used. The pressure canner ensures that food in the jar is heated to a high enough temperature to destroy toxin-producing bacterial spores, like botulism. Boiling water is simply not hot enough, you must use a pressure canner in order to safely can meat.
Is there a science to your recipe versus say I use my own and can it? I’m asking as I’m going refined sugar free so I use no sugar ketchup and then add a little maple syrup as a sweetener, will that make a difference for food safety with canning?
The time & pressure is for canning beef (even if you just canned beef with nothing else added) it doesn’t matter if you add any sweetener here.
What is the shelf life of this recipe?
All home canned goods should be used up within 1 year.
Has anyone tried 1/2 pints and for how long in pressure canner?
Half pints would be the same amount of time in a pressure canner.
Hi, I followed the recipe/instructions and everything sealed perfectly but I’m seeing a ton of air pockets. I debubbled as best I could but it’s such a thick mixture. I’m wondering if it’s safe to store and eat with the air pockets.
I would just keep an eye on the seals but it should be fine.